TA AND TF SERIES FOLDING LEG PORTABLE STAGES - HEAVY DUTY, EASY SET UP, PORTABLE, MODULAR STAGING
TransFold Portable Stages give you the freedom to configure the stage to create any performance environment you can imagine. Our various sizes and heights give you the flexibility to build the exact size and shape stage that you need to accommodate your event.

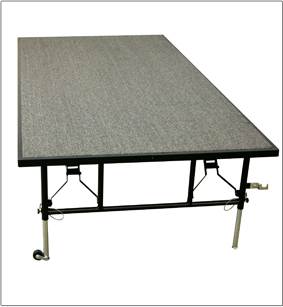
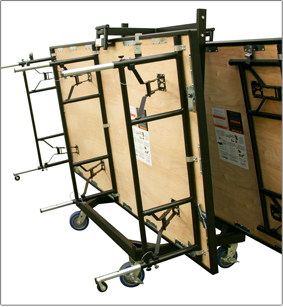
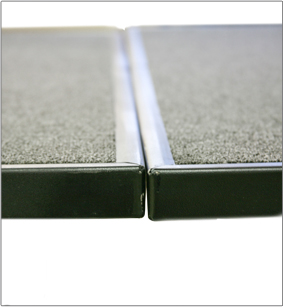
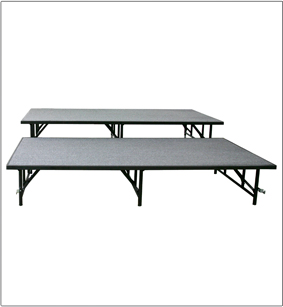
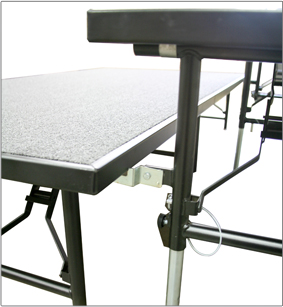
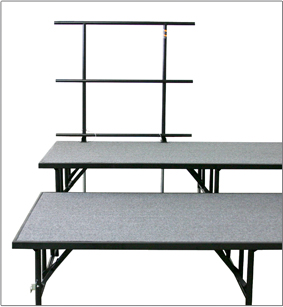
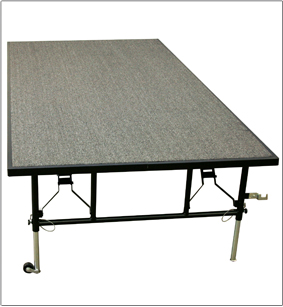
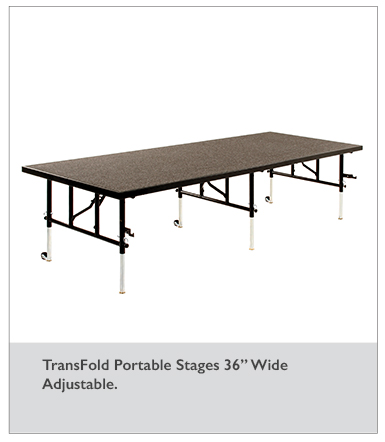
The Transfold Portable Stage is perfect for schools, churches, seminars, banquets, the list goes on and on. If you need the perfect stage for your event look no further than Midwest Folding's Transfold Portable Staging.


  • Leg Brace
  • Leg Brace
  • Leg Brace
Leg Brace Leg Brace
/div>
GET A QUOTE
Legs overlap when folded for storage. This reduces storage capacity by two to four units per cart.
Select Finish options
Select Finish Options
Deck

Hardboard
Skirting Styles
No Skirting

Box Pleat

Shirred
Black Metal

- Black
 
Select Finish Options
Deck

Black

Grey
Skirting Styles
No Skirting

Box Pleat

Shirred
Black Metal

- Black
 
Select Finish Options
Deck

Carpet
Carpet Colors

Charcoal Grey

Ebony Black

Pewter Grey
Skirting Styles
No Skirting

Box Pleat

Shirred
Black Metal

- Black
 
Quickship Quote 
All quickship products ship within 5 business days. This option is only available on select products and for quantities less than 10. For a full list of available quickship products click here.
Select Finish Options
Deck

Carpet
Carpet Colors

Charcoal Grey
Black Metal
- Black
 
Added to Quote Cart
 
Features
  • 4 different heights
  • Units fold to store
  • When folded, units fold to 2" in height when stacked
  • Dual height models
  • Constructed of heavy gauge steel and laminated plywood core decking for unsurpassed safety
  • Expansion sections available
  • Quick attach guard rails are available separately and recommended for safety
  • Weight capacity of 200 lbs/ft2, evenly distributed
  • 15-Year Warranty
Specifications
Available Mobile Stage Options
36" Wide Adjustable
48" Wide Adjustable
36" Wide Fixed
48" Wide Fixed
Width(s)
3', 4'
Length(s)
4', 6', 8'
Height(s)
Adjustable Height Options: 16" or 24"; 24" or 32"
Fixed Height Options: 8", 16", 24", 32"
Deck Styles
Hardboard, Thermoplastic, Carpet
QuickShip Eligible
Some models/styles are available for QuickShip (ships within 5 days for quantities of 10 or less). Look for the QuickShip tag when requesting a quote.
Note(s):
On select options, legs overlap when folded for storage - this reduces storage capacity by two to four units per cart. Please reference notes when requesting a quote.

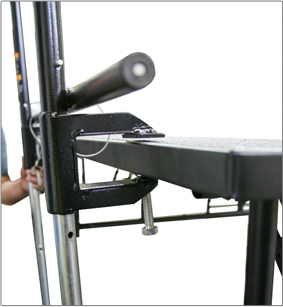
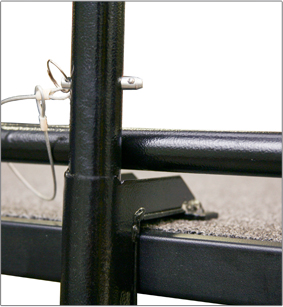
SAFETY NOTICE: Guard rails should be used on sides and rear.

Finishes
Decks

Black Thermoplastic

Grey Thermoplastic

Hardboard

Carpet
Carpet Color Options

Charcoal Grey

Ebony Black

Pewter Grey
Skirting Styles

Box Pleat

Shirred
Skirting Colors

Black

Burgundy

Jade

Navy
Metal

Black
 
 
Instructions
Preparing the Platform
Step 1: Unfold Unit
Unfold the legs, making certain that the leg braces are fully opened.
Step 2: Adjust Legs
Adjust each leg to the correct height by removing the clevis pin, loosen the thumbscrew one turn, and slide the insert to the desired position.
Step 3: Insert the Pin
Insert the clevis pin through the receiver tube and leg insert and tighten the thumb screws with moderate force.
Step 4: Extend Coupling
Extend couplings needed to join platforms at the same level by loosening the thumbnut, rotating the coupling so that it extends beyond the frame of the platform and tightening the thumbnut, making sure that the locking tab is properly engaged.
Step 5: Multilevel Riser Set
If constructing a multilevel riser set, rotate the coupling hooks so that they project from each leg.
Unloading Platform
Step 1: Gravity Operated Lock
Rotate the gravity operated lock located at the top of the caddie and hold it open so that the platform will clear the lock.
Step 2: Important
After the platform passes under the lock, allow the lock to rotate downward to secure the remaining stages.
Step 3: Tilt and Balance
Tilt the top of the platform toward you until the wheels contact the floor and the platform is comfortably balanced in your hands.
Assembling a Stage Set
Step 1: Roll Platform
Roll each platform into position starting with the left side of the back row and building toward the right.
Step 2: Coupling Hooks
As platforms are added, roll each one into exact positions and lower slowly to the floor, allowing the coupling hooks to engage with the frames of the preceding platforms.
Assembling a Riser Set
Step 1: Tallest First
Start with the tallest platforms at the rear by following step 1 - Assembling a Stage Set.
Step 2: Lower Level to Taller
Couple lower level platforms to taller platforms by lifting the frames of the lower platforms over the coupling hooks located on the legs of the taller platforms and the couplings of the platforms at the same level.
Installing Guard Rails
Step 1: Important!
Guard rails should be used at the back and sides of all stages whenever possible. Risers should be assembled with chair stops or guard rails at the tallest level.
Step 2: Clamp
Slide the guard rail clamp over the edge of the platform at the desired location and tighten the bolts on each clamp
Step 3: Stabilize
Extend the stabilizer inserts by releasing the spring button, sliding the stabilizer until it reaches the floor and engaging the spring button in the corresponding hole.
Step 4: Adjust
Adjust the leveling glide until the glide is in firm contact with the floor.
Loading Platforms
Step 1: Platform Position
Roll (if adjustable legs) the platform toward the cart, taking care to center platform with the cart.
Step 2: Tilt Platform
When the platform contacts the vertical support of the cart or a previously loaded platform, tilt the platform up to the vertical position.
Step 3: Important!
After the platform passes under the lock make sure that the lock rotates downward to secure the stages.
Step 4: Adjust
Adjust the leg inserts on one or more leg assemblies to their lower position and then fold all legs by pushing in on the center of the leg braces.
1500 Taylor Avenue, Springfield, IL 62703
312.666.3366 or 800.621.4716
info@midwestfolding.com